Agony Tutorial 001
Agony Tutorial 002
Agony Tutorial 003
Agony Tutorial 004
Agony Tutorial 005
Agony Tutorial 006
Agony Tutorial 007
Agony Tutorial 008
Agony Tutorial 009
Some user comments about the tutorials
"These were very helpful!!! Thanks a million!"
"I enjoy working with Agony very much and tutorials were very helpful"
"I have to express my joy in finding your agony program! I am having the best time using it (first blindly and then with your tutorials) ."
"It's very very helpful, thanks! "
"Its good to know that you made the tutorials. A few days back, I was trying to work on one of your program and it just didn't work!"
The "Animation Points" form.
Hello, the "Animation Points" window (the window in which you can define the motion of the start and end points of each frame through the duration of the animation) has been got rid of in Agony239.
The motion of the start and end points is now governed by the two curves "Animation - Start point" and "Animation - End point", both of which can be set by selecting them from the drop down list of curves in the "Points" window and then assigning a curve, either by drawing one, or by using some of the predefined functions in the "Path" window.
If these curves are defined, and you produce animation frames, the start and end points of each frame will move according to those two named curves.
Hopefully this is at least somewhat comprehensible, if not, ask again and I'll try and explain further.
For a tutorial about all the "curves" in the "Points" window, please see
Agony Tutorial 006
Thanks.
-
This tutorial will introduce the new "Animation Points" form. This form allows you to define paths, either with the predefined "Path" form functions or with user drawn paths, that will govern the movement of the start and end points of your Agony pictures in animations. Each frame of an animation is a normal Agony picture, that is a series of curves drawn from one location (the "start") to another (the "end"). This tutorial will teach you how to move the "start" and "end" around in animation.
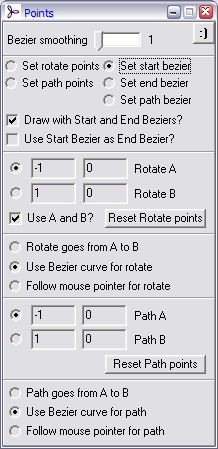
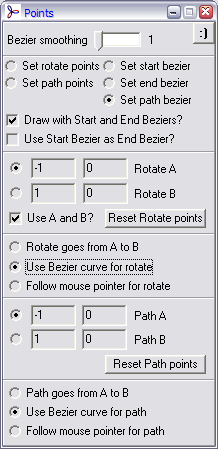
First of all, make sure the "Points" form is showing, and select the "Set start bezier" option. With this selected we are able to draw onto the Agony canvas, with the right mouse button, the shape of the "start" curve in our Agony picture.
-
With the "Set start bezier" option selected, draw an "a" shape on the canvas. You draw this by moving the mouse around while holding the right mouse button down. The canvas should now look like this:
-
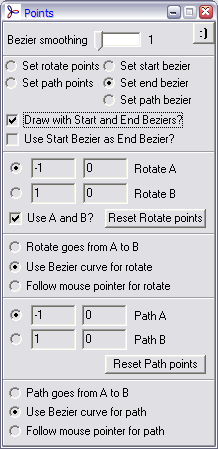
Go back to the "Points" form, and make sure that the "Set end bezier" option is selected

-
With the "Set end bezier" option selected, draw a "b" shape on the canvas. You draw this by moving the mouse around while holding the right mouse button down. The canvas should now look like this:

-
On the "Points" forms, make sure that the checkbox "Draw with Start and End beziers?" is ticked. This setting makes Agony use the curves you have just drawn as the "start" and "end" curves.
-
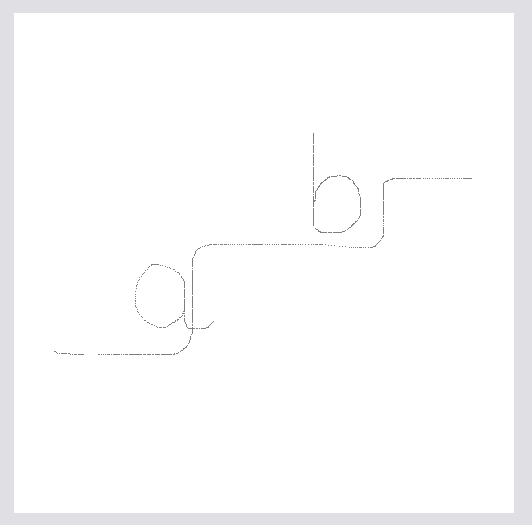
Go back to the "Points" form, and make sure that the "Set path bezier" option is selected

-
With the "Set path bezier" option selected, draw a curve on the canvas. You draw this by moving the mouse around while holding the right mouse button down.
This curve will be the path that Agony uses drawing the steps between the "start" shape (a) and the "end" shape (b). The canvas should now look like this:
-
On the "Points" forms, make sure that the option "Use Bezier curve for Rotate" is selected. This option means that the center of rotation of each step from "start" to "end" moves along the path you drew out in the previous instruction.
-
On the "Points" forms, make sure that the option "Use Bezier curve for Path" is selected. This option means that the center of each shape in each step from "start" to "end" moves along the path you drew out in the previous instruction.

-
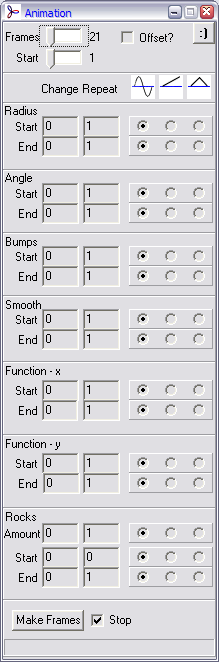
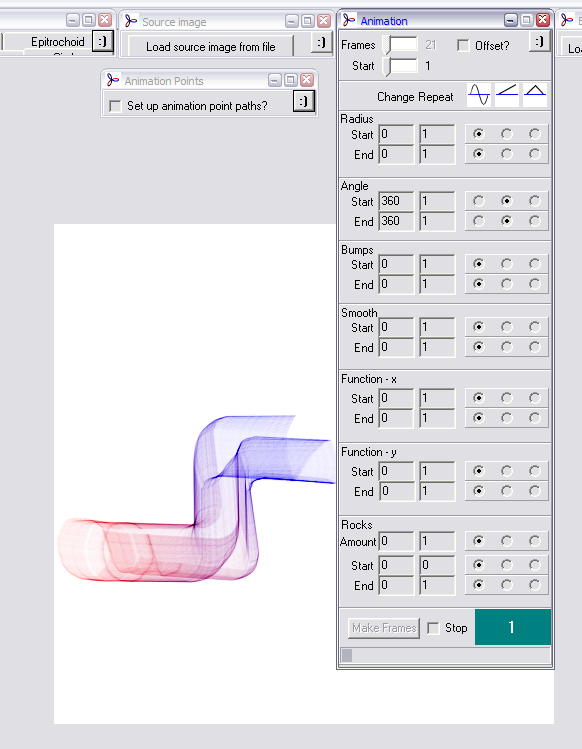
Now make sure that the "Animation" form is showing (F7).
Set the number of Frames to 21. This means that Agony will produce 21 frames for an animation.
If the checkbox "Stop" is ticked, untick it. This checkbox is used for halting the animation batch process of calculating the frames.
-
Now press the "d" key on your keyboard. This will make Agony draw a normal picture, but hopefully using the "a", "b" and path curves you have drawn.
Hopefully, your picture will look something like:
-
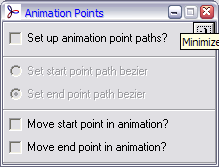
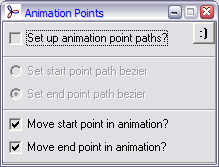
Now we are ready to move onto the "Animation points" form. The F10 key should make this form visible, if it is not already.
-
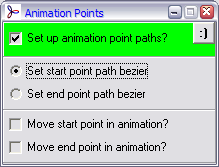
Select the "Set up animation point paths?" option. With this option selected, you will notice that the background is coloured green. This is just a visual reminder that it is set. While this option is set, the "Set start/end/path bezier" options in the "Points" form are disabled.
Also, with this option selected the two options below become enabled.

-
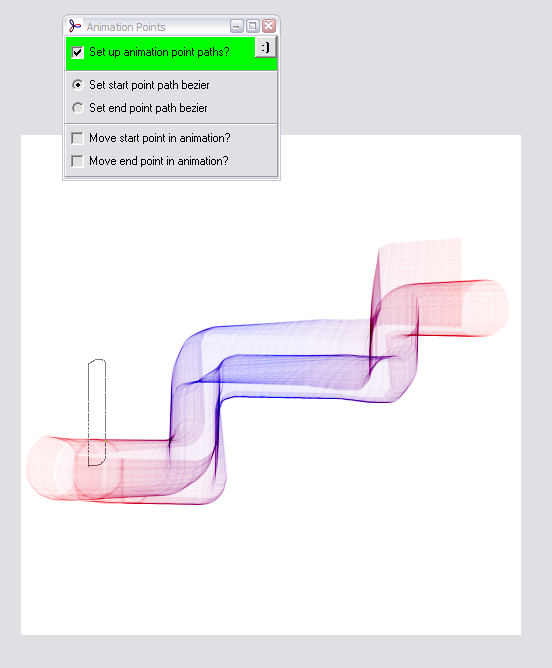
Firstly, select "Set start point path bezier", when this option is selected, we can draw a curve on the canvas which will be the journey of the "start" shape (a) over the course of the 21 frames of animation we shall calculate.
-
With this option selected, now draw a shape on the canvas. In the example, a small loop is drawn. This will be the journey the "start" shape takes during the animation.
-
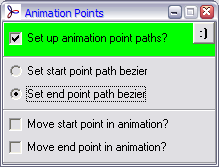
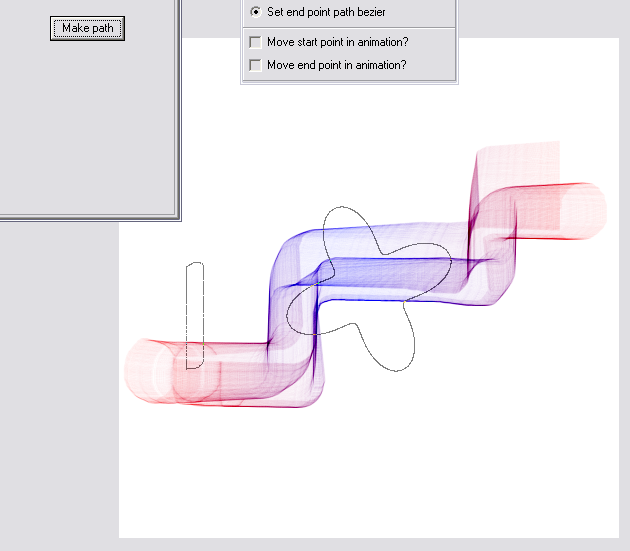
Now, select "Set end point path bezier", when this option is selected, we can draw a curve on the canvas which will be the journey of the "end" shape (b) over the course of the 21 frames of animation we shall calculate.
-
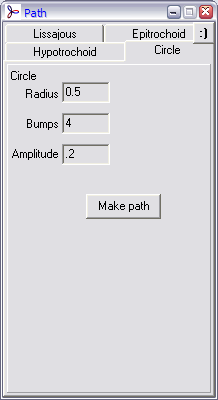
If we now go to the "Path" form (F5), and select the "Circle" tab. Fill in the values as shown. These values define a deformed circle with 4 bumps around its circumference.
-
If we click the "Make Path" button (while the "Set end point path bezier" option is selected in the "Animation points" form) the shape drawn will be the journey that the "end" shape (b) will travel during the course of the animation frames.
-
On the "Animation points" form, make sure that both the "Move start point in animation" and "Move end point in animation" are selected. If they are not, the "start" and "end" shapes will not move around according to the curves we have defined.
Also, unselect the "Set up animation point paths" option.
-
Go back to the "Animation" form (F7), and set the angle the "start" and "end" to 360. Make sure that the middle column of repeat options is selected. This middle column means that as the frames are generated, the angle through which the "start" and "end" shapes are rotated will go from 0 degrees to 360 degrees from the first frame calculated to the last.
Press "c" to clear the canvas, and then click the "Make Frames" button to set Agony calculating the animation frames.
-
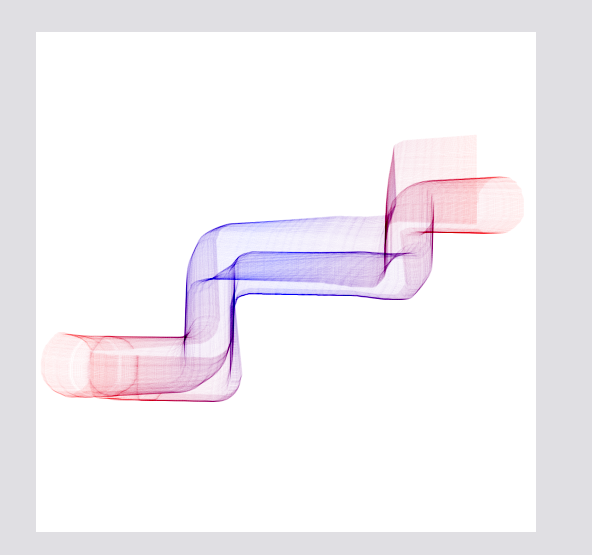
With any luck, the frames (when combined into an animation in the editor of your choice - I use Corel PhotoPaint) should look something like this, with the "start" shape (a) moving in its small loop, and the "end" shape (b) moving in its more complicated deformed circle path.
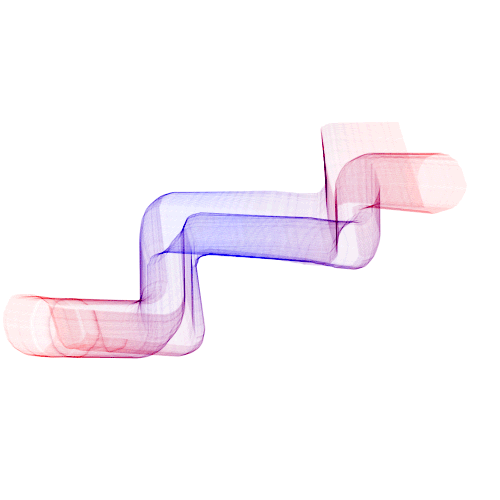
This is the end of this tutorial. Hopefully you found it interesting and of some use.
Agony Tutorial 002
Agony Tutorial 003
Agony Tutorial 004
Agony Tutorial 005
Agony Tutorial 006
Agony Tutorial 007
Agony Tutorial 008
Agony Tutorial 009
Some user comments about the tutorials
"These were very helpful!!! Thanks a million!"
"I enjoy working with Agony very much and tutorials were very helpful"
"I have to express my joy in finding your agony program! I am having the best time using it (first blindly and then with your tutorials) ."
"It's very very helpful, thanks! "
"Its good to know that you made the tutorials. A few days back, I was trying to work on one of your program and it just didn't work!"
The end.