Agony Tutorial 001
Agony Tutorial 002
Agony Tutorial 003
Agony Tutorial 004
Agony Tutorial 005
Agony Tutorial 006
Agony Tutorial 007
Agony Tutorial 008
Agony Tutorial 009
Some user comments about the tutorials
"These were very helpful!!! Thanks a million!"
"I enjoy working with Agony very much and tutorials were very helpful"
"I have to express my joy in finding your agony program! I am having the best time using it (first blindly and then with your tutorials) ."
"It's very very helpful, thanks! "
"Its good to know that you made the tutorials. A few days back, I was trying to work on one of your program and it just didn't work!"
Using source images and saving with transparency.
-
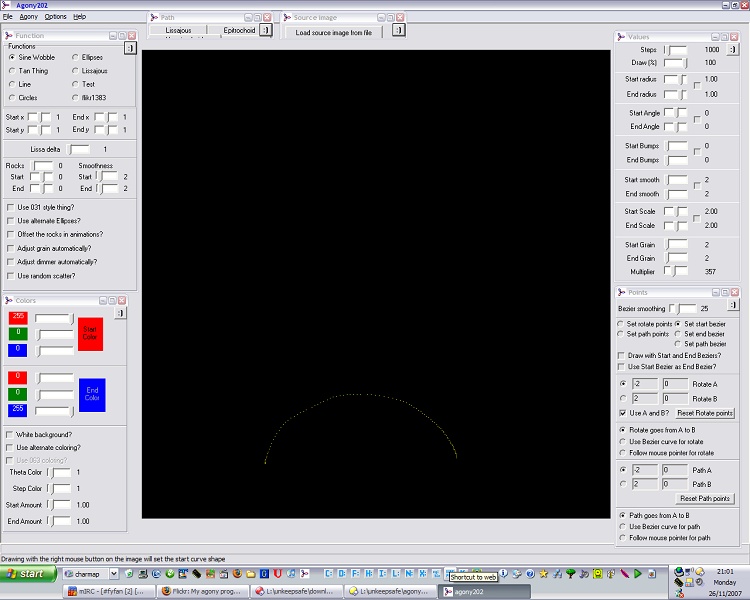
Load agony202.exe, and maximise it, and make sure the 'Function', 'Values', 'Colors', 'Points' and 'Source Image' option windows are open. F1, F2, F3, F4 and F6 will open these windows.
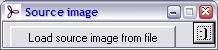
Click the 'Load source image from file' button and then navigate to a picture/photo/image that you wish to use.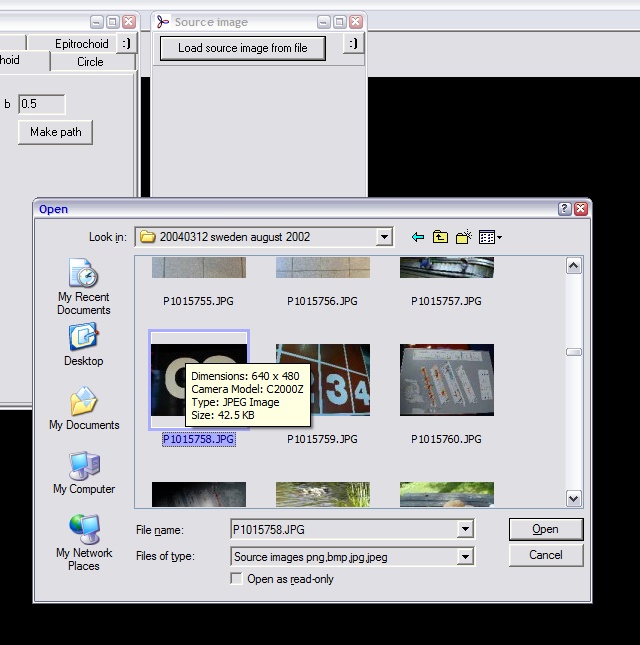
-
You will see that the 'draw with the image' is ticked. This means that Agony will use the image that you have loaded for the picture it will draw - instead of calculating colours as normal.
Set the 'End repeat per step' to 4.
When Agony is using a source image to draw with, each step of Agony's image gets its colour from a particular row of pixels from the source image. Here the 'Start repeat per step' is set to one, this means that the first step of Agony will correspond to one row of the source. The 'End repeat per step' being set to four means that the last step of Agony's image will have one row from the source repeated four times along its length.
Agony also displays a small thumbnail of the image it is currently using to draw with.

-
Having set these options, shrink the 'Source Image' option window by clicking the ':)' button
-
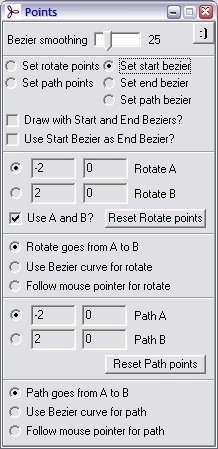
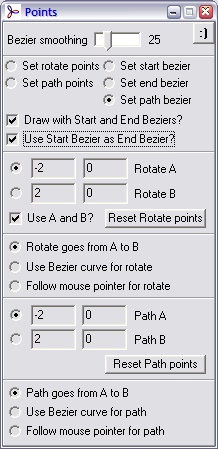
In the 'Points' window, select 'Set start bezier'
-
Move the mouse over the Agony 'canvas' and then while holding down the Right mouse button, draw out a shape like the one shown. This will define the shape that Agony will start drawing its steps with.
-
In the 'Points' window, select 'Set path bezier'

-
Move the mouse over the Agony 'canvas' and then while holding down the Right mouse button, draw out a line moving from one place on the canvas to another. This line defines the path along which Agony will draw the shape you drew in the 'Set start bezier' instruction.

-
In the 'Points' window, select 'Use start bezier as end bezier'. This tells Agony that you want to use your defined start curve as both the start shape and the end shape, rather than defining a new shape which the start curve will transform into.
Again in the 'Points' window, select 'Draw with Start and End beziers?'. This tells Agony that you want to use your defined start and end shapes rather than its predefined functions.
-
In the 'Points' window, select 'Use Bezier curve for rotate' and 'Use Bezier curve for path'. This tells Agony that you want to draw each step with its center along this 'path', also that the center of rotation at each step will be at the same point along this path.

-
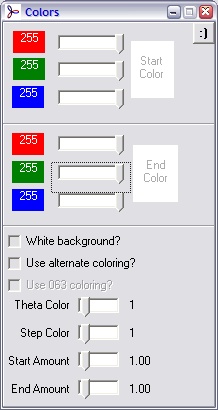
In the 'Colors' window. Drag the sliders so that the start and end colours are both full on white.
-
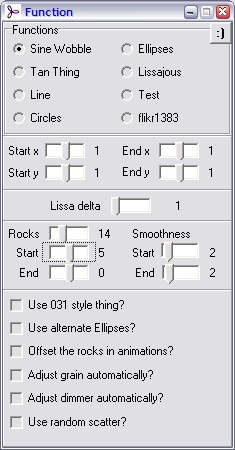
In the 'Function' window set 'Rocks' to 14, and Start 5 and End 0. This means that as the shape travels along its path it will 'rock' 14 times. Initially wobbling by +/-5 degrees gradually settling to zero degrees of wobble by the last step.
-
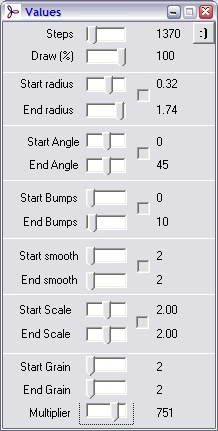
In the values window, set the settings to the ones shown below. These settings mean:
Agony will draw 1370 'steps'
The shape it draws will start small ('radius' 0.32) and grow to 'radius' 1.74
The shape will start off rotated by zero degrees - its orientation will be as you drew it in the earlier step.
The shape will end up rotated by 45 degrees anti-clockwise from the orientation you drew.
The shape will start off undistorted ('bumps' = 0)
The shape will end up with 10 wobbles along it
-
Press the 'e' key to watch Agony as it is drawing
Press the 'd' key on your keyboard to start Agony drawing
Press the 'e' key to toggle drawing each step. Not drawing every step can be significantly faster than doing so
An image should appear on your screen:

-
In the 'Agony' menu, select the 'Use transparency' option

-
In the 'Agony' menu, select the 'Set Opacity' option. This will display the opacity settings window. In this window you set how opaque/transparent you want to save your Agony image. The transparency in Agony is calculated differently at every pixel, based on how far the pixel is from the background color (black or white depending). On a black background, white will be opaque, but a dark-grey will be fairly transparent, depending on the level set in the 'Set Opacity' option window.
s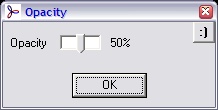
-
Save the image with the key combination CTRL+S, or via the 'File' menu.

-
Now you have saved a semi-transparent Agony image based on a source image of your choosing. You can now use that semi-transparent image in your preferred image editing software and use it as an overlay onto whichever image you like - offering a large range of opportunities for messing about :)

Agony Tutorial 002
Agony Tutorial 003
Agony Tutorial 004
Agony Tutorial 005
Agony Tutorial 006
Agony Tutorial 007
Agony Tutorial 008
Agony Tutorial 009
Some user comments about the tutorials
"These were very helpful!!! Thanks a million!"
"I enjoy working with Agony very much and tutorials were very helpful"
"I have to express my joy in finding your agony program! I am having the best time using it (first blindly and then with your tutorials) ."
"It's very very helpful, thanks! "
"Its good to know that you made the tutorials. A few days back, I was trying to work on one of your program and it just didn't work!"
The end.